Create A Campaign - Send Mailers Automatically
Create a campaign that automatically sends a mailer after a recipient is added to a Mailing List.
Available Campaign Types
Where a calendar date is selected in advance, like birthdays, we order your piece 8 days before that date.
Monthly - Monthly will send to your entire mailing list EVERY MONTH before the selected day of the month.
Yearly - Yearly will send to your entire mailing list EVERY YEAR before the selected day of the Year.
Holiday - Yearly will send to your entire mailing list EVERY YEAR before the selected day of the Year.
Birthday - Birthday will send to your mailing list EVERY YEAR before the date of your mailing list recipient's birthday field. This field is found in your mailing list, it can be edited as well as uploaded with your CSV.
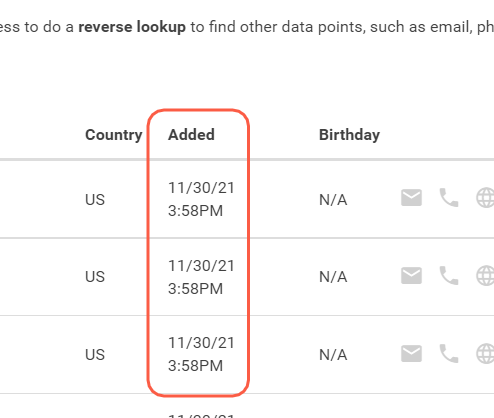
Days After Added - will send a postcard to your recipient in your mailing list X number of days after their address is added to a list, like an email campaign.
The 'Date Added' for each recipient is recorded in the mailing list.
Staggered Daily Sending - This will auto-schedule the mailer to be sent evenly throughout the year based on the number of touches you want. For example, if you want it to be sent 4 times over the next 365 days, you would enter '4' into the field.
Technically, It takes the number of people in the list and multiplies it by the number of touches you wanted in a year and then divides that by 365. That's the number that is ordered each day.
How To Setup A Campaign
In order for a campaign to run, it needs a Mailing List, a Message Template, and an Image template configured ahead of time.
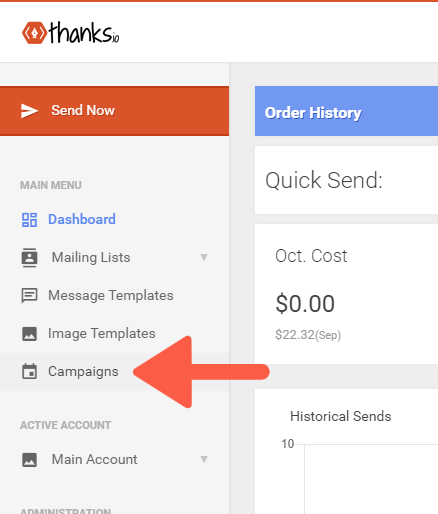
Begin by clicking on Campaigns on the left.

Click Add a New Campaign at the upper right.
Each campaign you create is for a single mailer. So, to schedule a sequence of mailers, you will create multiple campaigns in a sequence, just use the green 'Save And Add Another' button at the bottom.
Campaigns are auto-sorted in the dashboard based on which Mailing List they pertain to. We recommend you use the name of the mailing list as the name of the campaign to make things easier.
Begin by choosing the mailer type you want to send:
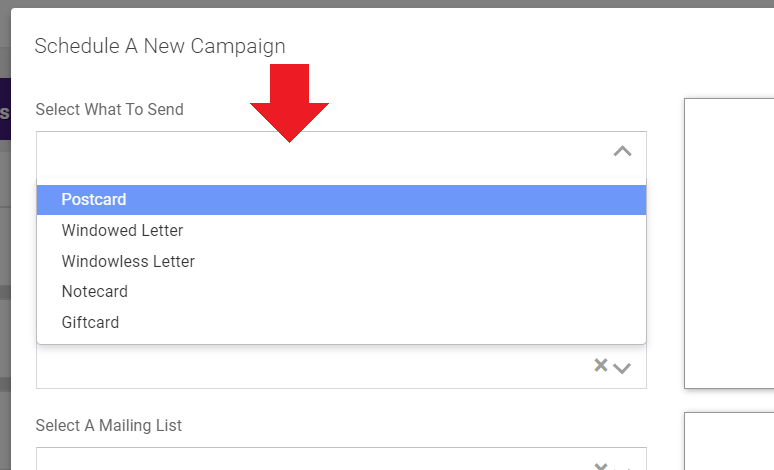
Your remaining options will be dictated by what you choose, and also what templates you may select.
For example, you can choose 4x6 or 6x9 as options when selecting Postcard. Only postcard templates will be selectable. The image and message content you choose will be previewed on the right.
Do you need to rename your image and message templates? Click Here
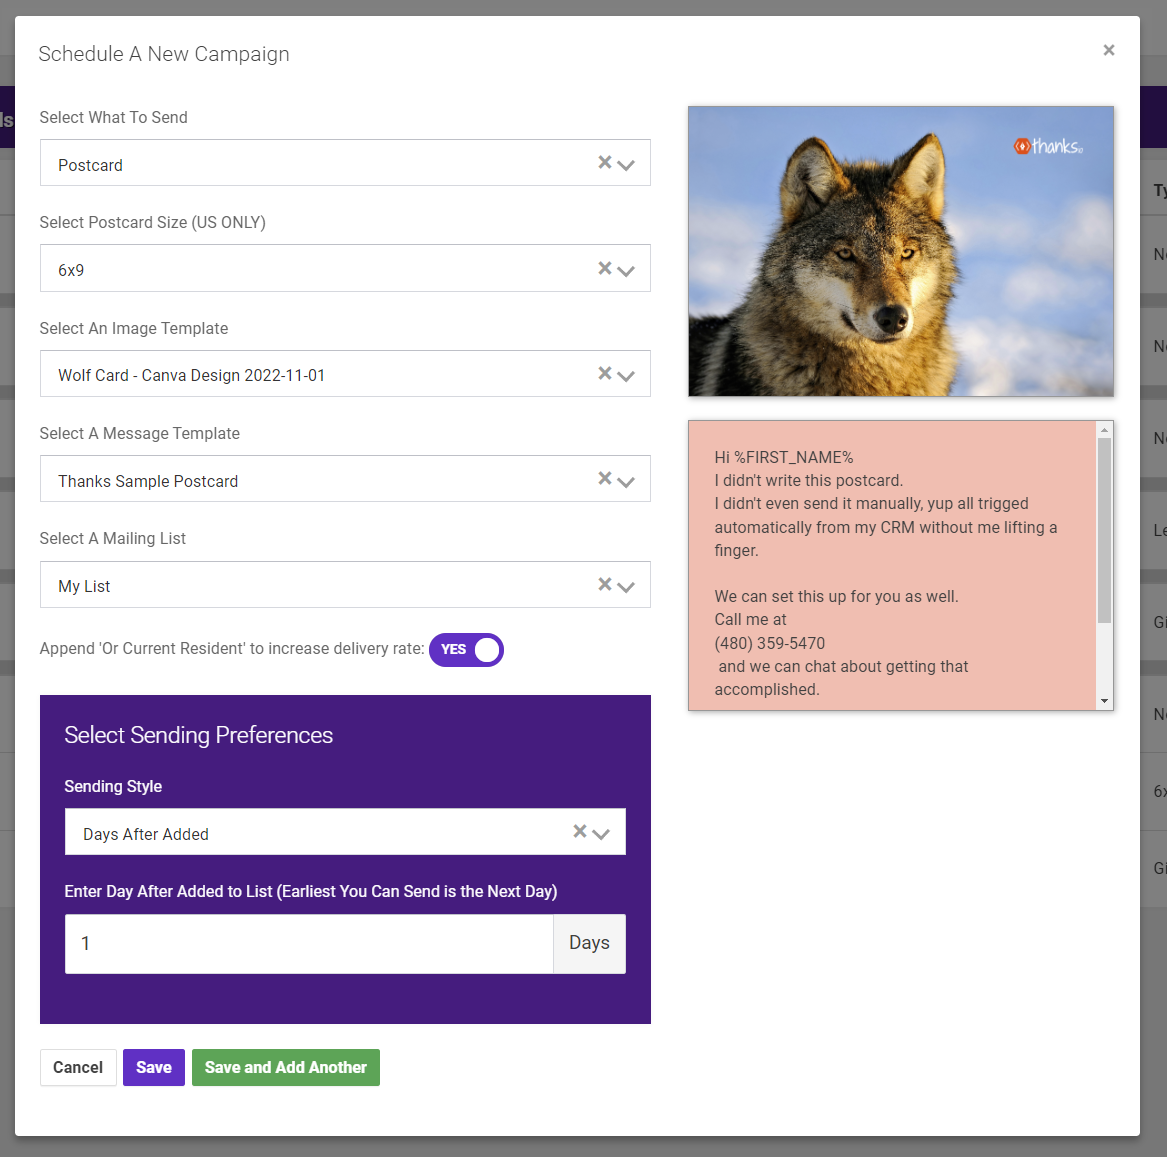
Click Save or Save and Add Another when you're finished. The campaign will be turned on automatically and you'll be shown the first mailing order date.
Generally speaking you're not going to have any actual orders placed as soon as you save a campaign. After a campaign is saved, you can disable it until you're ready using the switch to the right of the campaign.
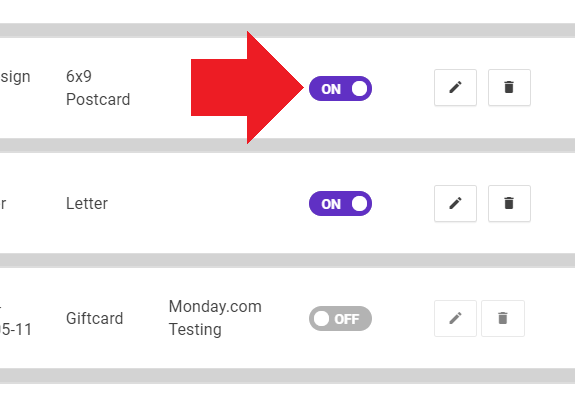
Switching A Campaign OFF or ON
Note: Campaigns which are disabled during a time where a mailer would be sent will not be retroactively ordered after turning the campaign back ON.
Additionally, if you set up something like a birthday campaign, and the recipients birthday that you added is in 5 days, the order will not be placed automatically because it is within our 8 day scheduling for that campaign type.
Removing recipients from a Campaign.
You can delete recipients in a Mailing List anytime:
Find them by name or address via searching your mailing list. Click the delete icon to the far right of that person to delete them.
Use a Zapier Zap to delete from any mailing list.
Delete by address via the thanks.io API.
Add the recipient to a suppression list to prevent any mail going to that address globally.