
How To Create A Dynamic Postcard Template
What is a Dynamic Postcard?
A dynamic postcard is a special image template that can change based on who it is sent to. You can add content like "Hello %FIRST_NAME%!" and it will print the recipient's first name onto the design. All of the elements you see are customizable.
You can set:
Design
Header
Footer
QR URL
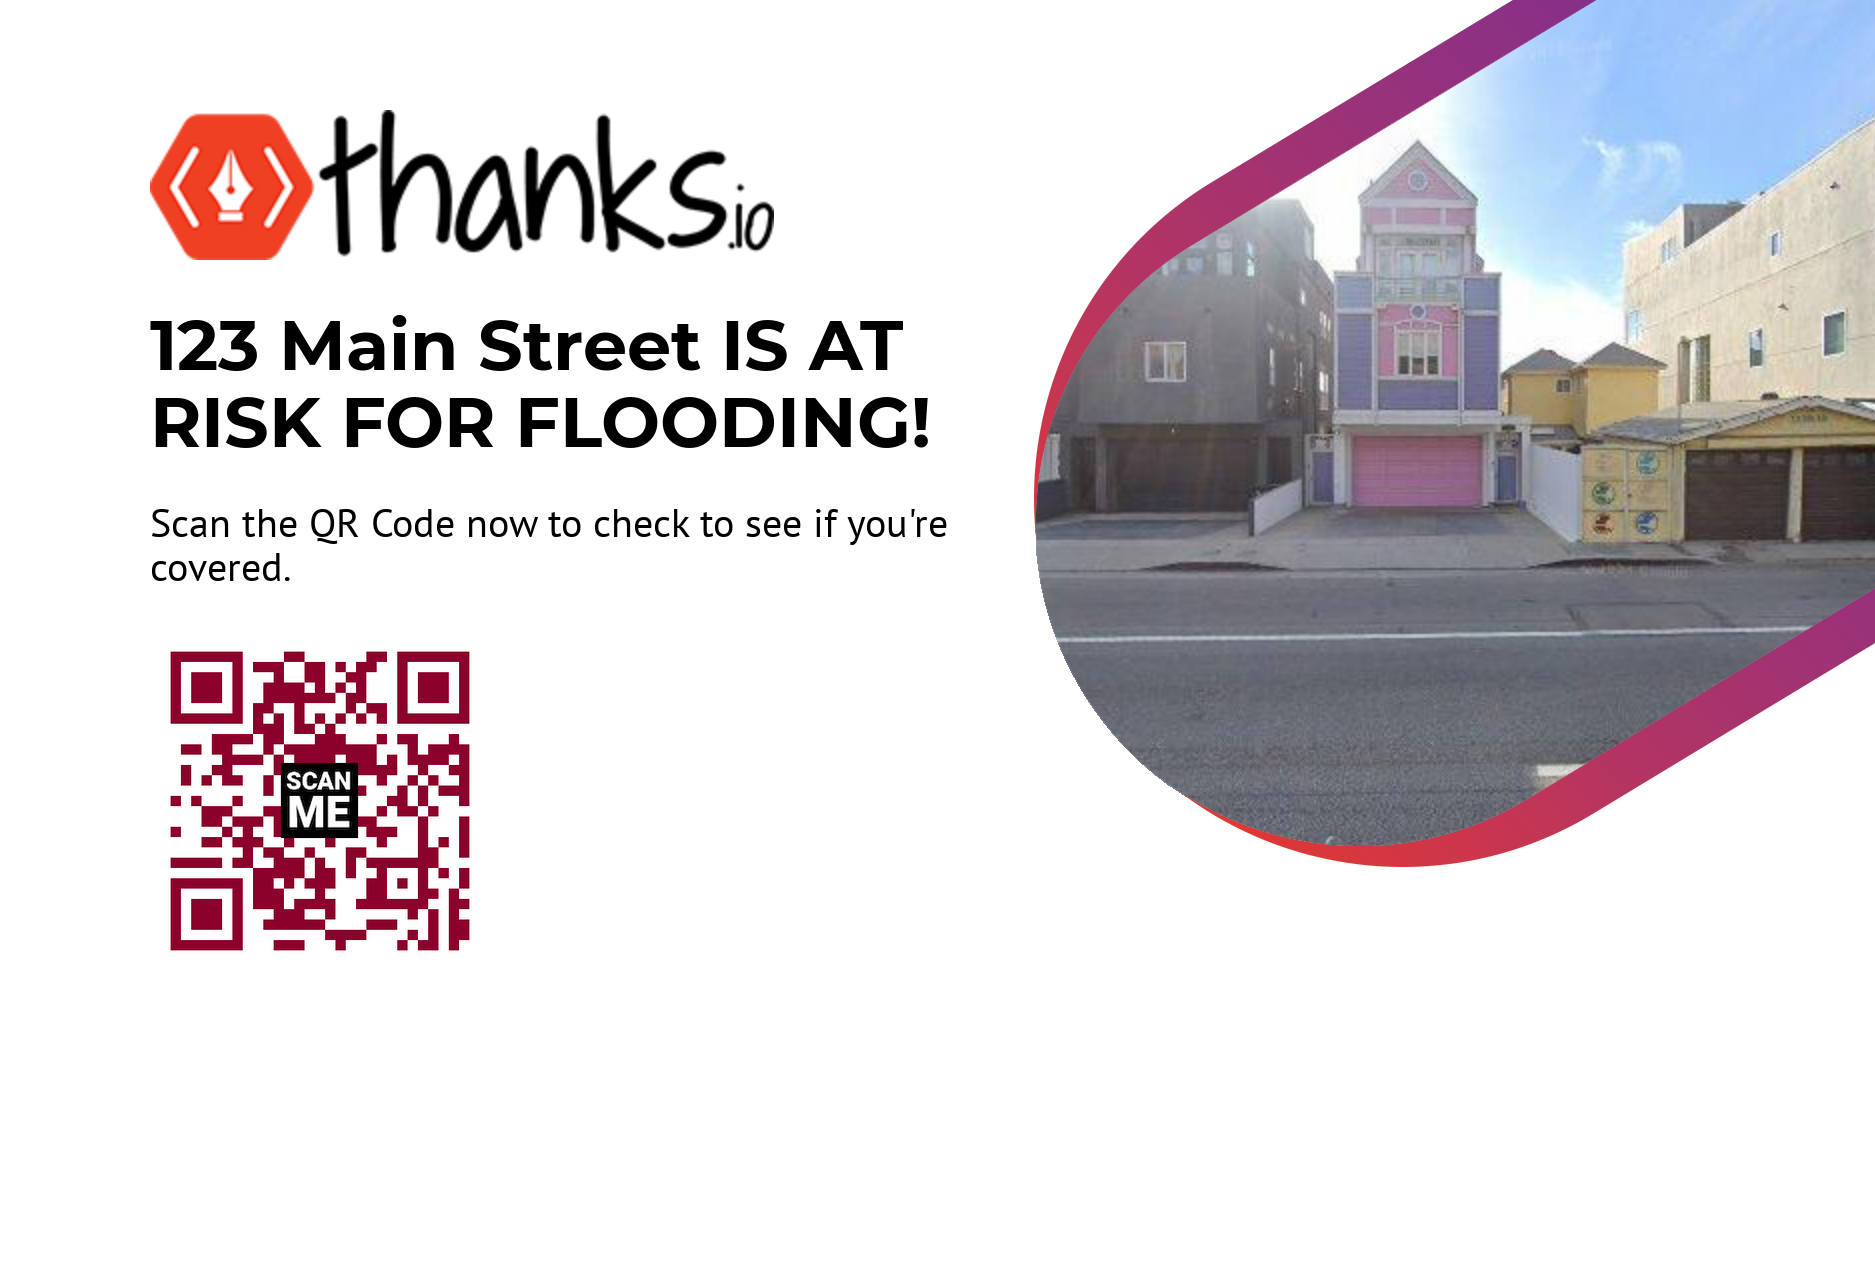
Background Image (Google Street View shown above.)
Logo
Custom Overlay (Use a Transparent PNG so the background image pokes through from the bottom layer.)
These fields can all be powered by recipient data (especially custom values) or even customized via a zap using information from your favorite CRM.
How-To
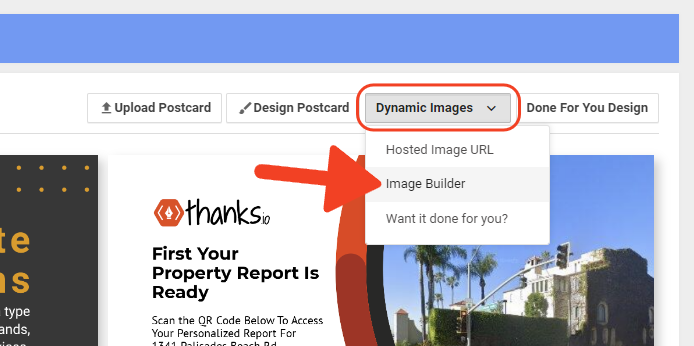
First, click on Image Templates on the left side of thanks.io.
Then, click the 'Dynamic Images' menu at the top right, and click 'Image Builder.'
You must specify a Template Name before you can save your template.
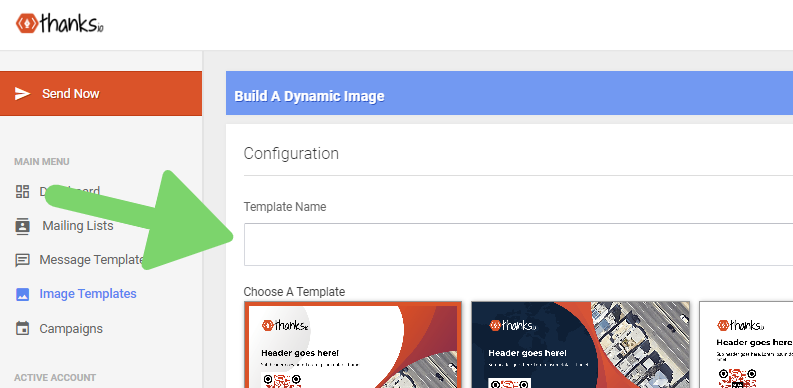
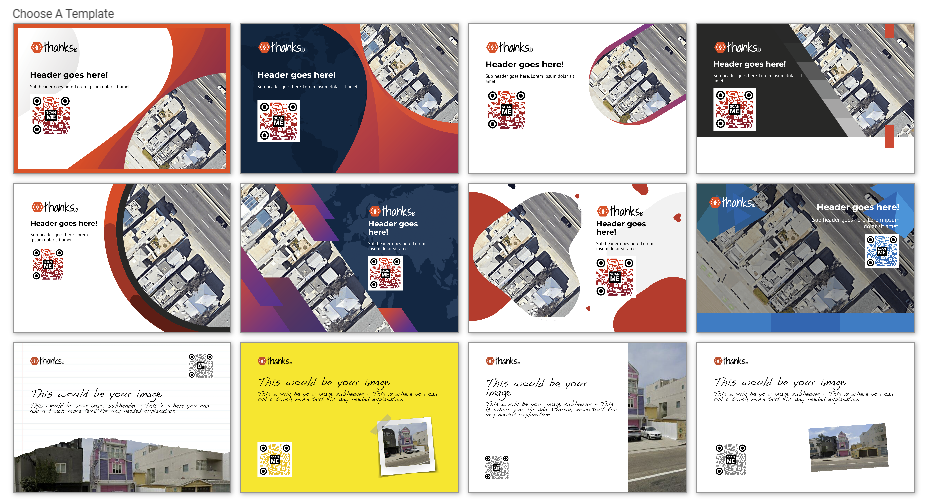
Now, select a layout. The content of the layout (text, and images) are all dynamic or 'variable.' They can change automatically based on each recipient, but how they are arranged on the card is dictated by the chosen layout.
The primary differences account for different styles or colors of logos and other content. Some cards have better layouts for fewer words, some have better layouts for more words.
Choose the layout you think you like the best (it's easy to change.)
Background Image URL
Taggable means you can use the 'Data Tags' to customize the text entered for each recipient the card is mailed to. We will cover these data tags in more detail, later in this guide.
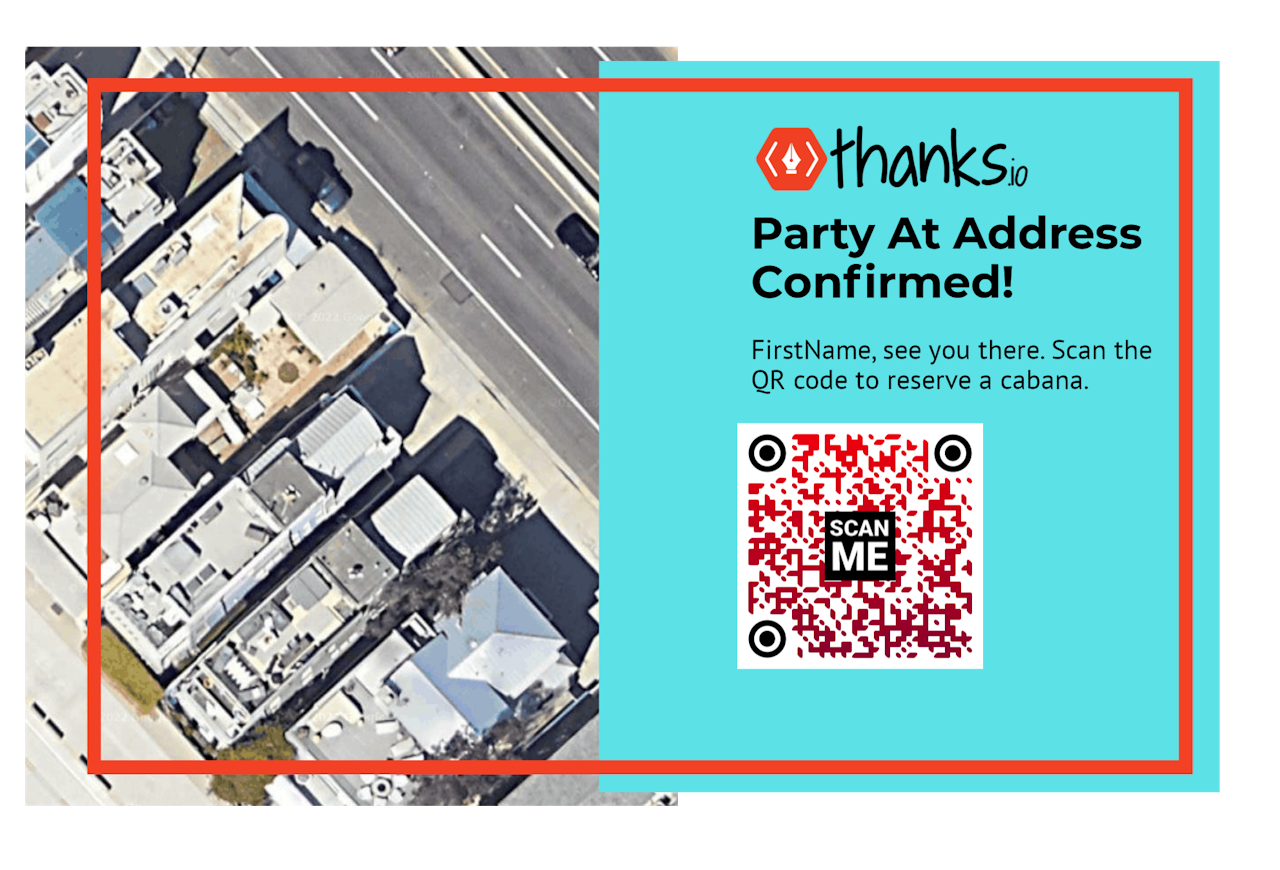
In each layout sample, you'll see the 'background image' is a Google maps image that sits underneath the design (overlay) of the card.

The Background Image URL can be one of three things:
A URL you specify, to a jpg or png image that starts with http:// or https://.
Taggable: Means you can use data tags in your URL for the purposes of auto-generating recipient-specific images. In layman's terms, it's possible to use info from your CRM or even your digital advertisements to customize the background image for each recipient.
You may upload your own image to use on every card, from your device by clicking on the upload image button to the right.
Finally, you may use a Google Street View or Map View data tag as the background image. The google image of the recipient's address is what will be printed on their card. To use either function simply click on the blue link to enter the ~STREET_VIEW~ OR ~MAP_VIEW~ variable.
You can have the google street or map view differ from the recipients address with custom variables. Set the word absentee as the recipient's Custom1 field, and enter the full address you would like the google image to represent in the recipient's Custom2 field.
Header
The Header field contains the large text that will be printed onto the card design.
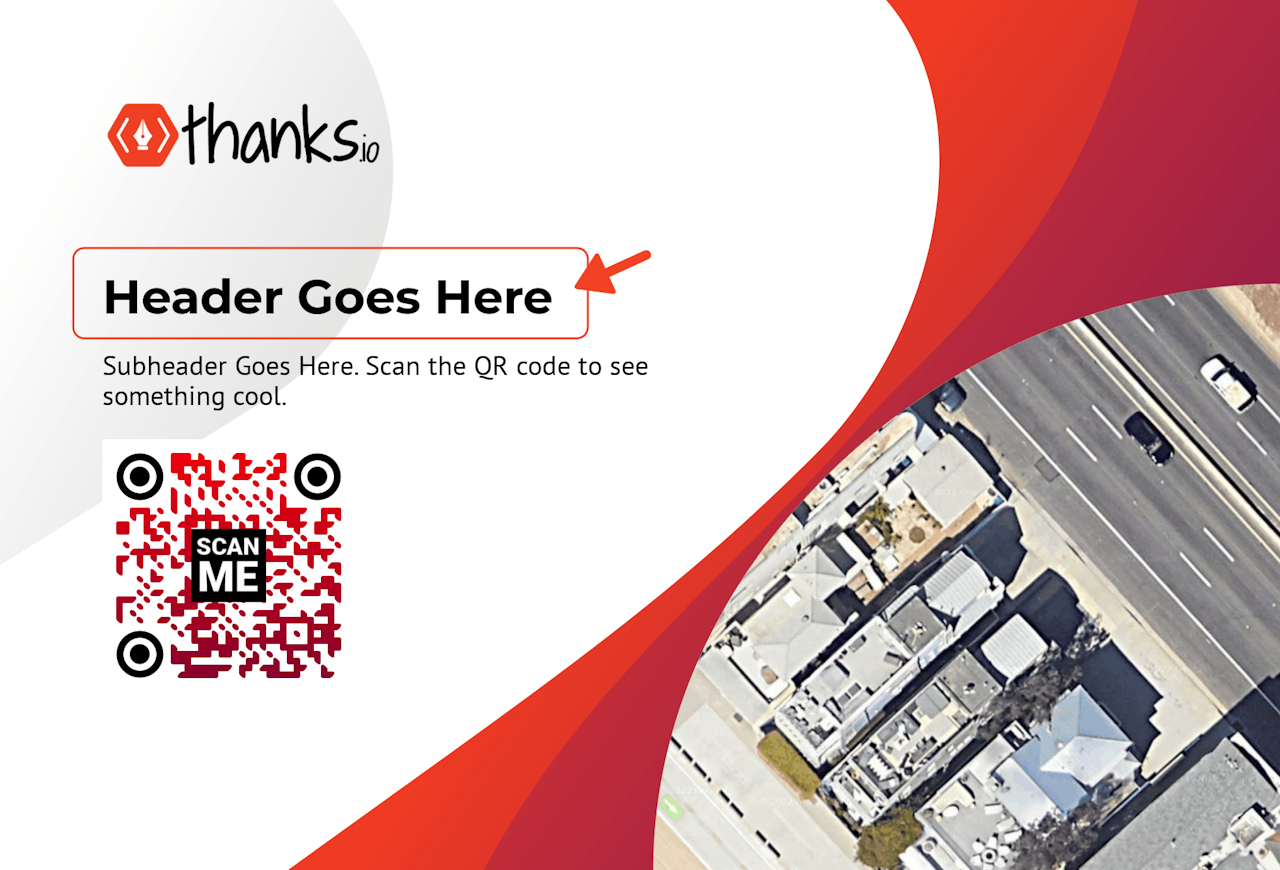
You may use data tags to customize your header, like:
~ADDRESS~ IS AT RISK FOR FLOODING
~FIRST_NAME~, I've been trying to reach you!
Check The Current Value Of ~ADDRESS~
Subheader
The subheader functions exactly the same as the header, just appearing as smaller text. Be sure to direct recipients to scan a QR code if you intend to provide one.

QR Code/Redirect URL
This field accepts any URL, meaning it starts with http:// or https://.
Use Message QR
It's typically easier to match the URL from your message template to the front, dynamic side of the card using the ~MESSAGE_QR~ data tag. If you want the QR code on the front of the card to differ from the back (address side) of the card, then use this URL field to set your 'front side' QR code manually.
This URL field is taggable: Use it to populate recipient-specific information like a coupon code or part of a link to a personalized report with data tags.
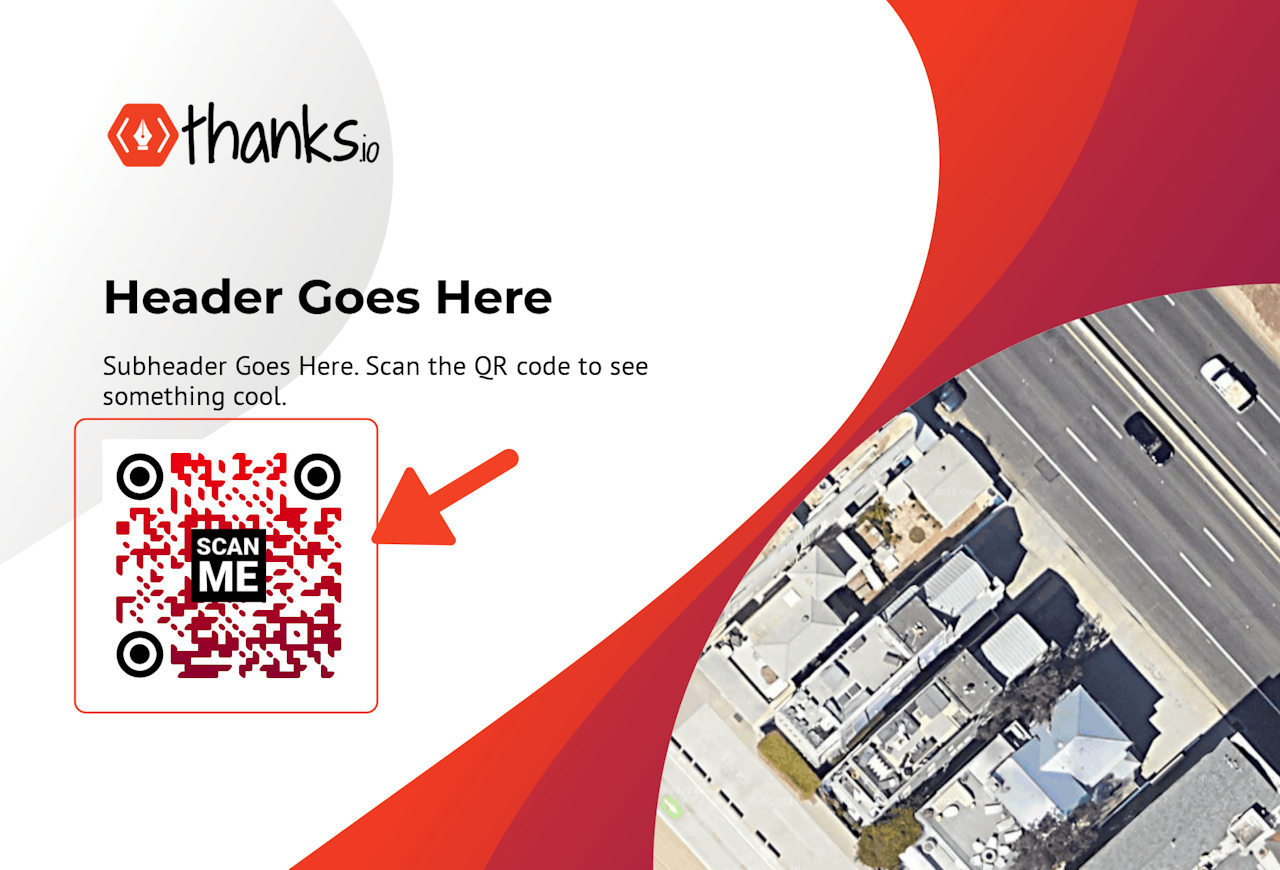
When using a custom overlay, the QR code prints as black and white.
Overlay Image URL
If you arrange all of the graphics in our dynamic image in a stack, like a sandwich, then the 'overlay' is a graphic that sits in the middle of this stack with holes in it, like a piece of swiss cheese.
It sits below the Header/Subheader, QR, and logo, and above the Background Image URL.
You can develop your own overlays, and upload them to create your own totally custom dynamic cards no matter how terrible:
You can use this link to insert a transparent 1875x1275 png file (just copy the URL and place it into the overlay field), to see how the overlay covers up what's underneath.
You can use this link to get the dynamic templates for each ID in Canva.
Note: If you set your own overlay, the QR Code color will change to black and white.
Hint: to create overlays in Canva with 'holes' in them, download your creations with the 'transparent background' option checked. The background color will not be included in the downloaded image.
Note: id is the layout ID used to generate the image. You'll find the id in the URL of the images you generate. More on that later.
Data Tags (Taggable)
Beneath the card preview on the right, you'll see a box containing 'Dynamic Data Tags.'
These tags can be inserted into any of the fields marked 'taggable'.
Each tag is a placeholder or variable that will hold information that pertains to the recipient.
Using these tags we can personalize nearly any aspect of our dynamically generated card design.
To use a tag, first click into the text box that you want to add the tag to. Then, click on the tag button in the Dynamic Data Tags box on the right to insert the data tag.
You can directly type in tags where required.
Available Tags:
~FULL_NAME~ | Prints the recipient's Full Name. |
~FIRST_NAME~ | Prints the recipient's First Name. |
~COMPANY~ | Prints the recipient's Company Name. |
~ADDRESS~ | Print's the recipient's Street Address. |
~ADDRESS2~ | Prints the recipient's Address Line 2. |
~City~, ~STATE~,~ZIP~ | Prints the recipients City, State, or Zip |
~CUSTOM1~ | Prints the data found in 'Custom 1.' Data may come from meta tags, Zapier, CSV Upload, etc. |
~CUSTOM2~ | Prints the data found in 'Custom 2.' Data may come from meta tags, Zapier, CSV Upload, etc. |
~CUSTOM3~ | Prints the data found in 'Custom 3.' Data may come from meta tags, Zapier, CSV Upload, etc. |
~CUSTOM4~ | Prints the data found in 'Custom 4.' Data may come from meta tags, Zapier, CSV Upload, etc. |
~VV_TITLE~ | If Visitor View is installed, then this will print the title of the webpage it was installed on. |
~VV_IMAGE~ | If Visitor View is installed, then this will print a screenshot of the webpage it was installed on. |
~VV_LAST_URL~ | If the recipient was captured by Visitor View, print the URL of the last page the recipient was on before they were captured. |
Absentee Google Maps Or Street Image
When you want the auto-generated Google street view or map view background image to differ from the recipient's address, you can specify the address you want to show in the recipient's record.
You can do this on csv upload, via zapier, etc.
Set the recipient's Custom 1 field to the word 'absentee' and add the full mailing address (Street, City, ST, Postal, Country) to the Custom 2 field.
Dynamic Image Preview & URL
At the bottom of the list of inputs to generate our dynamic card, there is a 'Generate Preview' button.

This generates not only a preview but the actual linked image that will be printed when this template is used. (example)
You must generate a preview before you're able to save.
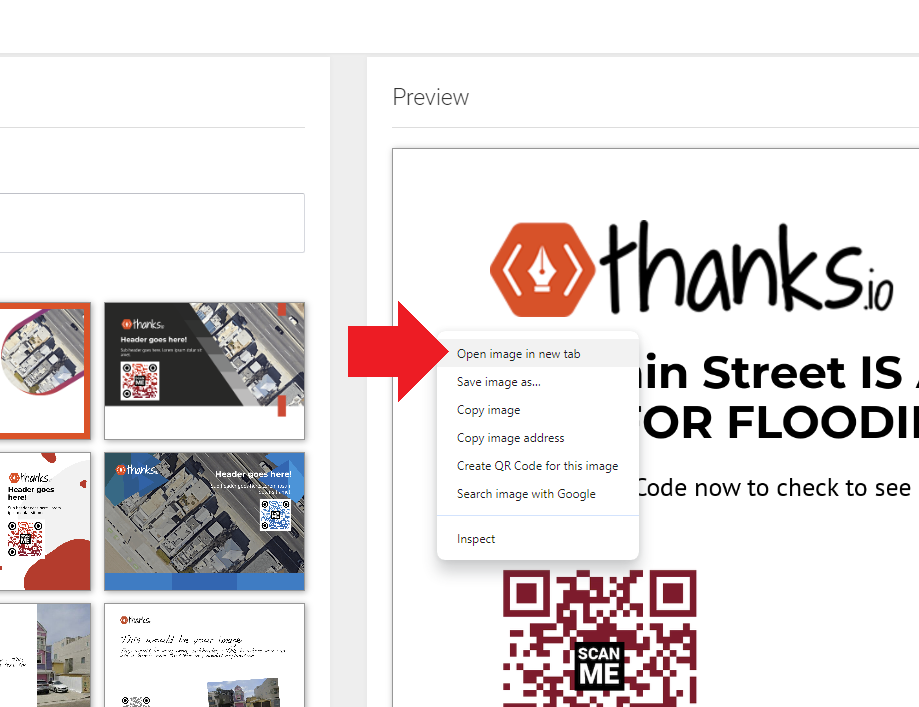
Note: Using Dynamic Images in API/Zapier After the Preview image is generated, it will show on the right. Right click it and open it in a new tab to get the URL to use in Zapier or other connections as the Image URL for your mailer design.
To save a Dynamic Image Template, click the purple button at the bottom of the page. It may take a minute for the template to save. Wait for the green message to show that it was done.